
Planting a mini forest
Top tips on when and how to plant your mini forest.
It’s time to get planting! Doing it properly and at the right time helps your trees to quickly grow strong and healthy, bringing benefits to people and nature. Poor planting is one of the main reasons young trees don’t survive, so it’s important to get it right.
When to plant your mini forest
The best time to plant trees in the UK is during winter, when trees are dormant. This puts less stress on them, especially for bare-root trees. A broadleaf tree is dormant once it has lost all its leaves.
Most trees will become dormant during November and will come out of dormancy towards the end of March. The dormant period will vary according to tree species, their location and weather conditions. Climate change can make weather patterns unstable, so it's important that timings are flexible. The latest time to plant trees is before the end of December, so trees can settle in and become more resilient before the dry spring weather comes.
National Tree Week is usually in late November. It is a great time to plant trees and get your community involved.
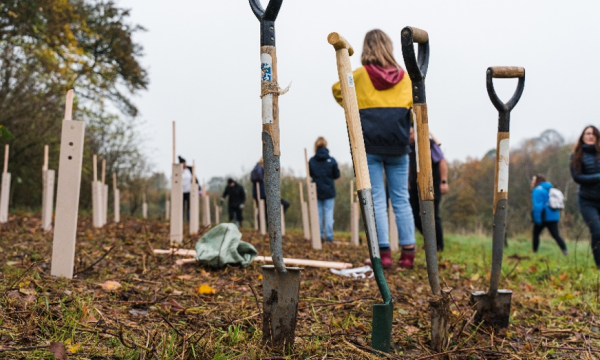
Planting tools
Mini forests are usually planted with small trees called whips, which are either bare-root or cell-grown and under 1 metre tall. The soil is prepared so it is loose and airy, making planting easier. Use a planting spear or a narrow planting spade for most whips. If the roots are large, a larger spade may be needed.
Planting methods
Choose your method based on the type of tree you are planting:
- Bare-root trees: use the I-notch or T-notch method, depending on the size of the roots.
- Cell-grown trees: use pit planting or twist a planting spear through the soil to create a cylindrical space to plant the tree.
In all cases, make sure that the tree is planted at the right depth. The root collar (also called the root flare) is the point where the roots meet the stem. This must be level with the ground. This makes sure that the tree is stable and can get water and nutrients from the soil. It also allows the roots to get oxygen from the air.
If a tree is not planted deeply enough, the roots can be exposed and the tree can easily fall over. All roots should be below the soil surface. Planting a tree too deeply can lead to the base of the stem rotting.
Notch planting
Notch planting is a quick, effective way to plant young trees without digging a full hole. Commonly used in conservation, hedgerow, or woodland planting, it’s fast and works well in grassy or rough ground.
There are two main types of notch planting:
Straight notch (I-notch) planting
Best for softer ground and single-stem trees.
How it's done:
- Push your spade straight down into the ground to make a deep vertical slit
- Wiggle the spade slightly to open up a small gap
- Remove the spade and insert the tree’s roots into the slit, making sure the roots are spread out and not bent upwards
- Push the soil back in firmly with your heel to close the slit and secure the tree
T-notch planting
Best for tougher, grassy ground.
How it's done:
- Push your spade straight down into the ground to make a deep vertical slit
- Make another vertical slit at a right angle to the first slit to create a T-shape
- Put the spade back into the first slit. Wiggle it to push up the turf either side of the second slit and open up a small gap
- Remove the spade and insert the tree’s roots into the slit, making sure the roots are spread out and not bent upwards
- Push the soil back in firmly with your heel to close the slit and secure the tree
Benefits of using notch planting
- Quick: plant hundreds of trees in a day
- Low disturbance: keeps soil structure intact
- Good root contact: helps trees settle in
- Ideal for bare-root whips in winter
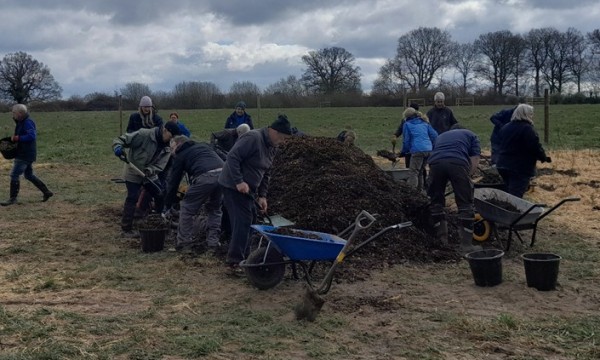
Mulching
Once your trees are planted, add a layer of mulch about 10cm (4 inches) deep around each one. Mulch helps keep moisture in the soil, reduces weeds, and gives your trees a better chance to grow strong.
Types of mulch
There are several good options including woodchip, seed-free straw and sheep's wool. Choose a mulch based on cost, the benefits to that type of mulch and how local the source is. You’ll need a lot to cover a mini forest plot.
Woodchip (fresh and matured)
- Woodchip is easy to get from local tree surgeons. Sometimes they will give it to you for free as it is a waste product for them
- Fresh woodchip can temporarily reduce nitrogen in the top layer of soil as it breaks down. This won’t harm trees as their roots will be deeper down. Aged or composted woodchip reduces this effect
- Large pieces can be used in thicker layers as it is less likely to form a mat on the soil surface
- Fine woodchip should be used more thinly to allow air into the soil
- Avoid mulch which has only come from conifers as it can reduce the pH of the soil, although this is unlikely to harm your trees. Mixed woodchip mulch is best
- Make sure the woodchip mulch is free from pathogens like honey fungus. Check that the supplier has not included infected material in their delivery. Infected material should be burned
- Green woodchip is great for feeding soil microbes, fungi and animals such as earthworms, woodlice and millipedes. Green woodchip breaks down more slowly and improve fertility over time. This is particularly useful for no-dig mini forests where the soil is not disturbed
Seed-free Straw
- Straw must be certified as seed-free. If seeds germinate, they can compete with trees for water
- In exposed sites, straw may need to be dampened or weighed down by adding a layer of heavier mulch on top. This should stop the straw from blowing away
Sheep’s Wool
- Wool may be available from local farms. Some farms may give wool to you for free as it is often a waste product
- Wool might provide a good habitat for small mammals which can damage the tree roots.
Planting day preparation top tips
Here are some tips to help your planting event go well:
- On planting day, give yourself plenty of time to sort the trees out before planting starts
- Untie all sacks and remove ties so the trees are easy to grab
- Keep different species in separate sacks and make sure their roots stay damp. As volunteers take trees out, they might get tangled up and fall out of the bags. Regularly check the trees are not being damaged or drying out
- Do not leave the roots exposed to the air or wind as this can rapidly dry them out
- Ask an experienced person to look after the trees during the event to make sure they stay in good condition
- Label the sacks with the names of the tree species. It can be hard to identify trees without their leaves!
Share your mini forests
Once your trees are planted, don’t forget to upload your project to our online tree tracker map and show off your new mini forest!