
Site preparation for a mini forest
How to improve the soil and get started on the groundworks.
This is the first hands-on step in creating your Miyawaki forest. It’s important because it includes work on improving the soil, a key feature of the Miyawaki method. It’s best to hire a professional contractor to dig out the existing soil.
Improving the soil
After doing a soil survey, you need to work out how much soil improver you’ll need. The exact amounts depend on your soil, but here’s a general guide.
Where a weight range is given in the guide, select more or less depending on your soil survey. For example, if you have sandy soil which is very pale in colour and with very few earthworms, consider adding compost and well-rotted manure at the higher levels.
Sandy soil
To improve water retention and structure, add plant-based well-rotted compost or local leaf mould if available. This also adds nutrients. Organic is best. Add 5 to 10kg per m2 of soil.
To add nutrients, add well-rotted horse or cow manure. Organic is best. Make sure it’s well-composted to avoid burning roots. Add 5 to 10kg per m2 of soil.
Clay soil
To loosen heavy clay soils, add chopped straw or coir/cocopeat. This will enable roots to rapidly establish. Add 5 to 10kg per m2 of soil.
To improve soil structure and add nutrients, add plant-based compost. Add 5kg per m2 of soil.
Loam soils
To improve soil structure and add nutrients, add plant-based compost. Add Add 5kg per m2 of soil.
All soil types
You can also add local forest topsoil, or microbial and mycorrhizal inoculant in very small amounts. This is important as it mimics a natural forest floor. Collect a few handfuls from a local mature woodland edge nearby, if the owner gives you permission.
Mulch is another useful soil improver. It helps to keep moisture, reduces weeds and supports soil life. A mix of broadleaf and softwood chips with bark works well.
Be careful of where mulch is collected from. Try to get local mulch if you can.
Green mulch from chipped young branches and leaves is particularly nutritious. Leaf litter and shredded leaves can also be used. You will need about 1 cubic metre of mulch per 10m2 of soil. Spread it 7 to 10cm deep across the planting area.
This information was taken from the Tiny Forest Planting Method Handbook, IVN Natuureducatie, 2019.
Sourcing materials
You can get these materials from local farms, garden centres or online. Try to have everything delivered close to your site before your contractor starts work. Make sure there’s a safe and accessible place to drop off the materials.
Timing
Give yourself plenty of time to prepare the site before planting. Ideally, try to finish the groundworks and fencing in summer or autumn before planting. This allows the work to happen when the soil is drier. It's especially important to work on clay soils when they are dry as their soil structure can be easily damaged when wet.
If you finish the groundworks a long time before planting, cover the bare soil with a 10cm (4 inch) layer of mulch. This helps keep moisture in and stops weeds from growing.
Tree care
If you collect your trees a few days before planting, store them in a cool, frost-free, and secure place like a shed, barn, or garage.
Open the bags and check the roots of bare-root trees. If they look dry, spray them with water or dip them in a bucket of water. It's important that the roots of bare-root trees do not dry out before planting.
Groundworks
The Miyawaki method involves digging a site down to 1 metre, so it’s best to hire an experienced contractor. Here’s a step-by-step guide you can share with them.
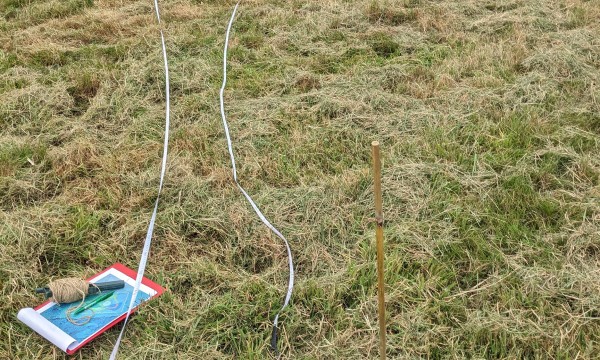
1. Mark out the mini forest position on the ground.
You'll need:
- Ideally, a satellite image of the site with the plot and dimensions marked on it. Google MyMaps is free and can help you to draw plots and maps
- A measuring wheel or tape
- String and canes
- Environmentally-friendly spray paint
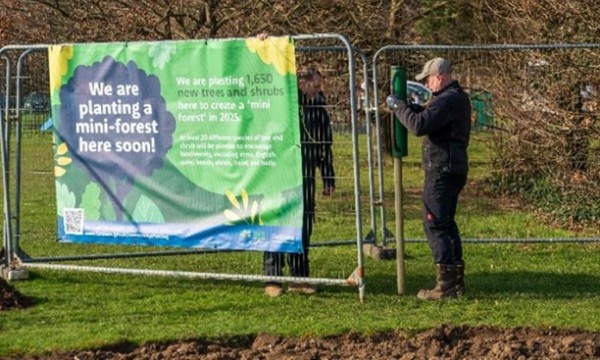
2. Secure the site with temporary fencing if needed.
You can use temporary fencing (like Heras fencing) to keep the site safe during the work. This means machinery and materials can be left safely on the site.
Top tips:
- Leave enough space inside the fences for machines to move easily around the whole site. Remember to allow space for storing soil improvers and turf that has been dug up
- You can put up posters around your site to explain to the local community what is happening. This can help reduce any concerns people may have
3. Scrape off any turf and put it to one side.
You will put the turf back into the bottom of the pit that has been dug. This helps keep nutrients in the soil and will stop the grass from regrowing on the surface.
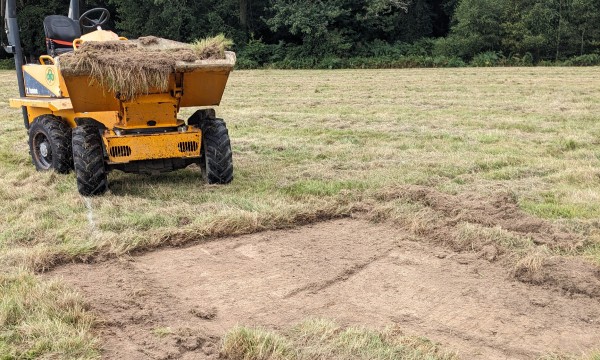
4. Remove the topsoil and put it to one side.
Set the topsoil aside separately from the turf. You will use it later.
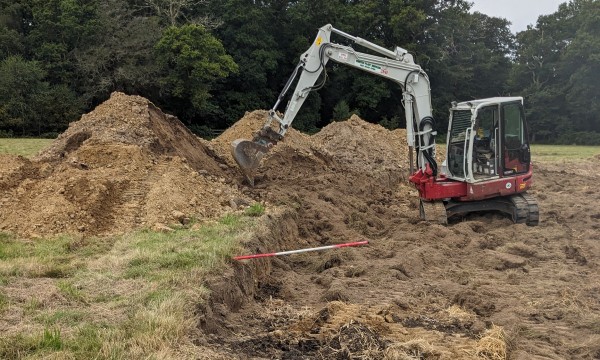
5. Dig out a pit about 1m deep and put the soil that is removed next to the pit.
If space is tight, you can work in sections. For example, dig the pit on one-third of the site, then follow steps 6 to 9 for that section. Repeat twice for the remaining area of the site.
6. Add the turf and half the soil back into the pit.
Don't put the top soil in.
7. Add soil improvers
Spread half of the compost, manure, and straw evenly into the pit.
8. Mix it all together using the excavator.
9. Pour the rest of the excavated soil (including the top soil) back into the pit and mix in the other half of the soil improvers.
10. Add mulch.
If you have mulch, spread a 10cm layer over the top of the soil.
11. The site is now ready for planting.
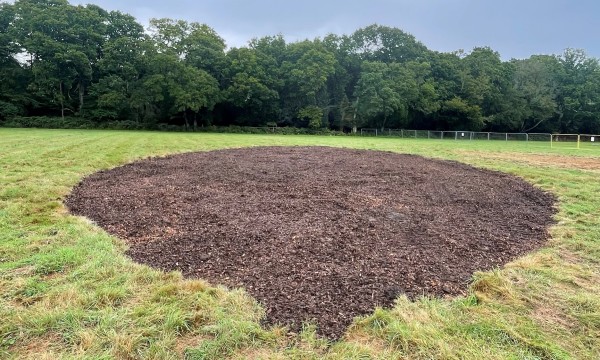
Letting the soil settle
After adding the soil and other materials, the planting area will have a small mound. This will settle a little. If you want to avoid a mound, you can use some of the soil from the pit to build a wildflower bank around the edge of the mini forest.
Use soil from deeper in the pit for your wildflower bank. It has fewer nutrients which is better for wildflowers. Place the bank in a sunny spot to help the flowers grow well.
Fencing
You may need to put up fencing around the edge of the mini forest for the first 3 to 5 years to protect young trees while they grow.
Try to install fencing as soon as possible after the groundworks are finished. Fencing must be installed before planting so the plot isn't disturbed once you have planted it. Some contractors may be able to carry out both the digging and fencing. They may be able to supply the fencing materials too.
Case study
At Berrywood Meadows, the mini forest was planted in three phases, each using a different method. Phase 1 was completed in early 2023. Phases 2 and 3 were completed in winter 2024/25.
- Phase 1: full dig. Soil was dug to 1 metre deep, following the full Miyawaki method
- Phase 2: half dig. Soil was dug to 0.5 metres, using half the amount of soil improving materials
- Phase 3: no dig. Turf was removed, but no digging or soil improvement was done
This was part of a trial across Hampshire in winter 2024/25 to see how different methods affect tree survival, health and growth over time. The trial mini forests were created across different soil types, which may in time show different responses to the depth that the site was dug out to.